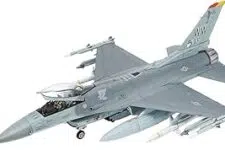
When it comes to building plastic scale models, mistakes happen. Even the most experienced modelers encounter mishaps during the process. But don’t worry—many of these mistakes can be fixed with a little patience and know-how. In this guide, we’ll cover the most common errors in plastic modeling and offer tips on how to fix them, so your final product looks polished and professional.
1. How to Fix Gaps in Plastic Models
One of the most common issues modelers face is gaps between parts after assembly. These gaps occur when parts don’t fit together perfectly, and they can be especially noticeable along the seams of your model.
Solution: To fix gaps in plastic models, you can use putty or filler. Apply a small amount of plastic model filler to the gap and smooth it out with a hobby knife or a fine sanding stick. Once it’s dry, sand the area lightly until the surface is smooth. If the gap is small, liquid cement or super glue may also work. Just be careful not to apply too much glue, as it can melt the plastic.
2. Repairing Paint Mistakes on Plastic Models
Painting plastic models can be tricky, and it’s easy to make mistakes, such as smudges, uneven coats, or paint bleeding into areas where it shouldn’t be. Fixing plastic model painting mistakes is important to maintain the overall look of your model.
Solution: If you notice a mistake while the paint is still wet, use a clean brush or cotton swab dipped in paint thinner or water (depending on the paint type) to remove the error. For dry mistakes, lightly sand the area with fine-grit sandpaper and reapply the paint. Masking tape can also help to cover areas you don’t want to paint, preventing future mistakes.
3. How to Fix Seams in Plastic Models
Seams are often a challenge for scale modelers. These visible lines, where two parts meet, can ruin the realistic look of your model if not properly addressed.
Solution: To fix seams in plastic models, apply a small amount of model filler or putty along the seam line. After it dries, sand it down gently until the seam is smooth and flush with the surrounding surface. For a more precise result, use a sanding stick or small files. After sanding, repaint the area to match the rest of the model.
4. Fixing Decal Silvering on Plastic Models
Decal silvering occurs when air gets trapped under a decal, creating a white or silver effect that can ruin the appearance of your model. This issue often happens when the decal is applied to a matte surface instead of a smooth one.
Solution: To avoid decal silvering, always apply decals on a glossy surface. You can fix silvering by carefully poking tiny holes in the decal with a pin and applying a decal-setting solution, such as Micro Set or Micro Sol, to help the decal conform to the surface. For stubborn silvering, you may need to reapply gloss varnish and repeat the decal application.
5. Repairing Broken or Misaligned Parts
It’s not uncommon for small parts to break or become misaligned during the assembly process. Whether it’s a fragile antenna on a military vehicle or a thin wing on an aircraft, broken parts can be frustrating.
Solution: For broken parts, use a small amount of plastic cement or super glue to reattach the piece. To ensure a strong bond, hold the part in place with tweezers or use masking tape to keep it steady while the glue dries. If a part is misaligned, carefully remove it and reassemble it properly. Sometimes soaking the joint in water or using a small amount of cement can help loosen the bond.
6. Fixing Uneven Paint Finishes
Achieving a smooth, even paint finish can be difficult, especially if you’re hand-painting your model. Uneven finishes, brush strokes, or spots of thick paint are common paint mistakes in plastic models.
Solution: Lightly sanding the uneven areas with fine-grit sandpaper can help smooth out thick paint spots. You can also thin your paint before applying it to achieve smoother results. When using an airbrush, make sure to apply multiple light coats rather than a single thick one. After fixing the problem, apply a clear coat to even out the final finish.
7. Correcting Warped or Misshapen Parts
Sometimes, parts of plastic model kits can arrive warped or bent, especially in older kits or if they’ve been stored in hot conditions. Trying to fit warped parts can lead to assembly issues down the road.
Solution: To fix warped plastic parts, carefully heat the piece by soaking it in hot water (but not boiling) for a few minutes. Once it’s softened, gently bend the part back into the correct shape. Hold the piece in the desired position while it cools, and it should maintain its new shape. Avoid using a direct flame or too much heat, as this can damage the plastic permanently.
Conclusion
Building plastic models is both a fun and rewarding hobby, but mistakes are part of the learning process. By knowing how to fix common errors such as gaps, seams, paint mistakes, and more, you can improve your skills and create models that look fantastic on display. If you ever make a mistake, remember that patience and attention to detail will help you get the results you want.
