Table of Contents
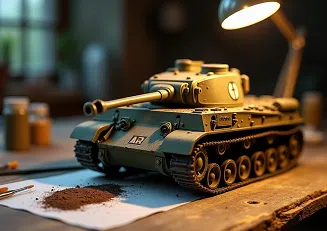
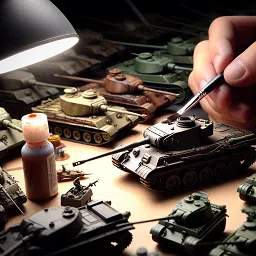
Acrylic paints have changed how hobbyists create scale model tanks. These paints dry faster and come in more colors than traditional enamel paints. But weathering a model tank in authentic battle damage needs more than just picking the right paint. You need specialized techniques like edge highlighting, dry brushing, and wet blending that create realistic wear patterns. Weathering model tank effectively is crucial for achieving stunning results.
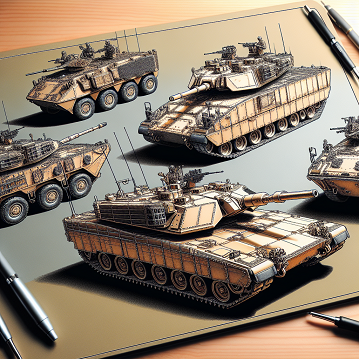
Scale model tank enthusiasts will value these proven methods to craft historically accurate WW2 pieces. You’ll learn to drill precise bullet holes and simulate scorch marks with diluted black paint. These weathering model tank techniques help turn simple scale model kits into museum-worthy displays. The guide covers weathering model tank techniques, battle damage creation, and historically accurate painting methods that make models come alive. These expert approaches deliver professional results, whether you recreate famous tank battles or design your own scenarios.

Incorporating weathering model tank techniques allows enthusiasts to add unique character and history to their models, making each piece a true representation of its historical context.
Essential Tools for 1:35 Scale Model Tanks
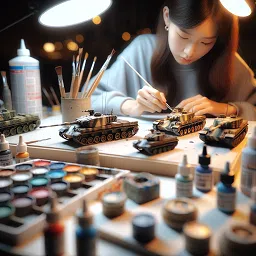
Scale model tank builders need specific tools to create realistic weathering model tanks with battle damage on 1:35 models. Expert modelers use specialized weathering kits that give them everything they need for authentic effects.
Professional Weathering Model Tanks Tool Kit Components
A good weathering model tank kit starts with oil paint sets in burnt umber and black shades to create depth and shadows. Weathering pencils and pigments create different textures, from dust to rust. Artists’ oil paints work just as well as specialized modeling products and cost less.
Modern vs Traditional Battle Damage Tools
Battle damage and weathering model tank creation has changed a lot from the old days. Expert modelers still love their Dremel tool with grinding attachments to make bullet impacts, but now they can also use specialized stencils and templates. You can create realistic spalling marks around impact points with heated needles or wire held by pliers.
Making anti-tank round impacts needs different tools based on the damage type:
- HEAT rounds need tools to make quarter-sized holes with radial burn marks
- AP round damage needs precise drilling tools for smaller, cleaner holes
Safety Equipment Requirements
Scale model tank work needs strict safety measures. You should wear protective gear when you work with liquids, dust, or strong-smelling materials. Your basic safety kit should have:
- Respirator masks for painting and weathering
- Protective gloves to handle chemicals
- Proper ventilation in your work area
Always wash your hands right after each modeling session. These safety steps are crucial because of the different chemicals and materials used in weathering.
Creating Realistic Bullet Impact Patterns
To become skilled at creating authentic weathering model tank battle damage, you need to understand how different anti-tank rounds affected tanks in World War II. Each projectile type left its own distinct impact patterns, and you need specific techniques to replicate them accurately.
Common WWII Anti-Tank Round Damages
WWII anti-tank ammunition created various damage patterns based on their design. Simple armor-piercing (AP) shells, made from hardened steel, left clean penetration holes that matched their diameter. HEAT rounds produced distinctive quarter-sized holes with radial burn patterns.
These weathering model tank techniques are vital for achieving authentic results and making your models stand out in any collection.
These effects scale down to 1:35 model tanks in specific ways:
- AP rounds: Small, precise holes with minimal surrounding damage
- HEAT rounds: Larger holes with radial spalling marks
- Artillery impacts: Irregular craters with extensive surrounding damage
Shell Impact Crater Techniques
You can create authentic shell impacts by thinning the plastic from the inside with a motor tool. The most realistic results come from grinding until the plastic becomes translucent. The characteristic raised ridge around HEAT round impacts can be simulated by heating an awl tip.
Paint plays a vital role in creating authenticity. A light rust neutral base coat should go on first, followed by German camo black brown to explain protrusions. Thinned orange rust helps blend colors and creates a natural, weathered look.
Armor Penetration Effects
Projectile type and impact angle substantially change armor penetration effects. Modern HEAT warheads can penetrate over 1,300 mm of rolled homogeneous armor equivalent. Scale models need carefully crafted exit wounds that show metal deformation.
Spalling effects need careful attention to detail. Machine gun impacts create random splash patterns due to movement and range factors instead of neat lines. You can replicate these effects by first thinning the plastic from inside and then using heated needles to create subtle impact marks.
The battle damage and weathering model tank come together with paint application. Silver highlights on exposed metal areas should go first, followed by graphite polishing on selected impacts to show fresher hits. This layered technique adds depth and authenticity to your scale model tanks.
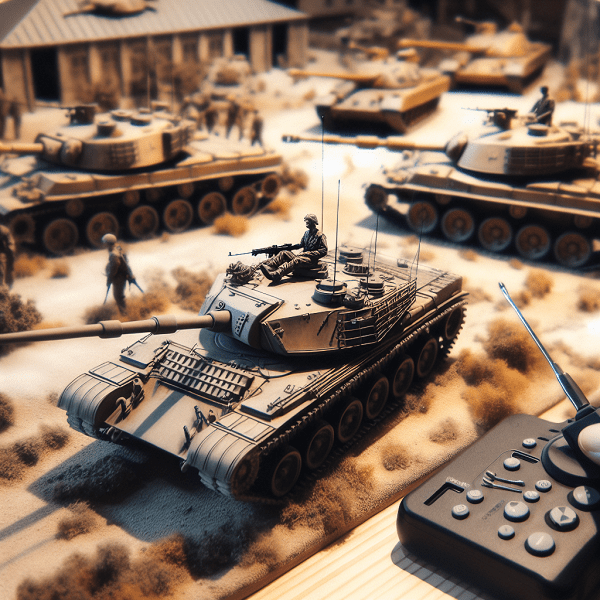
Advanced Weathering Techniques for WW2 Tanks
Scale model tanks show different weathering patterns based on where they operated in battle. Two major WWII campaigns teach us distinct ways to create realistic wear effects.
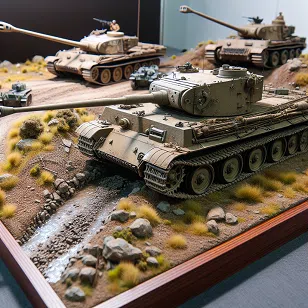
Desert Campaign Wear Patterns
Scale model tanks in 1:35 scale need special weathering techniques for desert operations. Tanks in North Africa faced harsh sun exposure and constant sand abrasion that left unique marks. Modelers start by mixing medium brown with white filters to create sun-bleached effects.
A clear gloss varnish comes first when creating authentic desert wear. The oil-based weathering model tank follows, giving better control over the aging process and creating realistic results. Desert operations left paint chipping along edges and high-wear areas. You can copy these effects with fine-tipped brushes or microfiber sponges.
Eastern Front Winter Effects
Tanks on the Eastern Front faced their own challenges that needed specific weathering model tank methods. Both German and Soviet forces used winter whitewash that created unique wear patterns. Here’s how to recreate them:
- Base coat preparation
- Water immersion followed by salt application
- Thin white paint application
- Salt removal after 20-30 minutes
- Weathering with washes
Salt techniques work great for creating authentic winter wear patterns. The process starts with dipping the tank in water after the base coat and sprinkling salt where the base color should peek through. The salt comes off after 20 minutes to show realistic paint wear.
Snow effects look better when you mix baking soda with gloss varnish or water effects. This mixture works best on tracks and wheel wells to look like packed snow. Vallejo Texture Paint in Dark Earth creates perfect mud effects under the snow, matching the harsh Eastern Front conditions.
Historical accuracy matters when simulating paint wear. German and American forces used temporary whitewash that wore off quickly and became streaky. You can get this look by applying thin white paint layers and carefully removing parts to show the base coat. This creates battle-worn tanks that match old photographs.
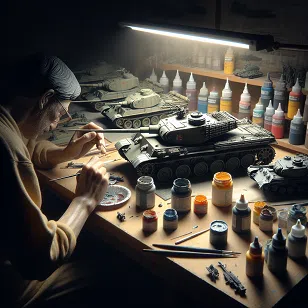
Painting Battle-Damaged Areas
Scale model tank builders must pay close attention to detail and use proper layering techniques when painting battle damage. The whole process starts with a good grasp of how different types of damage change metal surfaces.

Metal Exposure Effects
A light coat of silver paint creates the base for metal effects when simulating exposed metal on 1:35 scale model tanks. Graphite polishing on chosen impacts helps distinguish between fresh and older damage patterns. Careful polishing of edges and interior sections of shell impacts works best in areas that show the most wear.
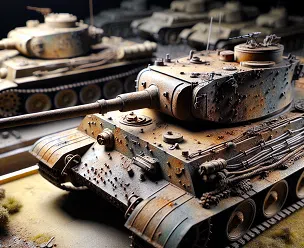
Rust and Oxidation Techniques
Authentic rust effects on scale model WW2 tanks need multiple layers. A neutral base coat of light rust works well for shell impacts. German camo black brown adds depth to protrusions and exterior edges where rust naturally forms faster. Thinned orange rust blends these colors naturally.
Large-scale model tank kits look more realistic with these paint layers:
- Base coat of light rust
- Dark brown highlights on edges
- Orange-brown variations
- Burnt umber oil paint streaks
- Graphite polish on selected areas
Burn Mark Creation
Heat damage patterns play a key role in creating authentic burn marks on scale model tank kits. Flat black paint goes on targeted areas first. Paint tends to carbonize rather than burn off completely, creating a gradient effect. Transparent paints ranging from violet through blue to red rose create the rainbow staining typical of heated metal.
Dark blue, violet, and brass colors layered over a steel base capture the unique look of heat-affected metal. This method adds depth and authenticity to the final appearance. Shell impacts and engine compartments need special attention since they would naturally show intense heat damage.
Black soot areas form the foundation of authentic scorch patterns. Dark gray, lighter gray, and small patches of off-white at the center complete the effect. Period photographs confirm that this technique matches actual battle damage perfectly.
Studying weathering model tanks can enhance your understanding of how different historical battles influenced tank designs and their subsequent damage patterns.
Historical Reference Guide
Scale model builders can learn about creating realistic battle damage and weathering model tank by studying authentic World War II tank battles. The largest tank battle in history took place at Kursk, where German and Soviet forces used over 2,000 tanks.
Famous Tank Battles Analysis
Scale model builders should pay attention to the distinctive damage patterns and weathering model tank from the Battle of Kursk. The Ferdinand tank destroyer units had formidable 88mm guns that could destroy Soviet vehicles at long range, yet they remained vulnerable to close-range infantry attacks. The Tiger I tanks led German attacks using the Panzerkeil (Tank Wedge) formation and absorbed Soviet anti-tank fire to protect more vulnerable Panzer IIIs and IVs.
German tanks’ combat performance showed specific patterns at this stage of the war:
- Tigers hit targets with 50-90% accuracy at 2-3 kilometers
- Panther tanks had mechanical problems because of rushed deployment
- Soviet T-34s worked so well that Life magazine called them “probably the best tanks in the world”
Photographic Evidence Study
Large scale model tank kit creators can find significant details in weathering model tank from period photographs. Allied tanks knocked out near Caen appear in images from Normandy, where they were gathered for material recovery. German Panzer IV tanks’ photographs show their distinctive “bazooka pants” – additional armor plates that protected against rocket attacks.
Scale model tanks ww2 enthusiasts benefit greatly from combat photography. Images from Operation Crusader capture British Crusader tanks passing burning German Panzer IVs, which show clear damage patterns and in weathering model tank. The Eastern Front photographs reveal destroyed tanks from the Soviet 19th tank division near the Vojnitsa-Lutsk highway, displaying authentic weathering patterns.
Wartime photography of tank recovery operations reveals that tanks often survived battle damage. Many tanks returned to service after field repairs when the damage wasn’t catastrophic. The British system worked quickly by using standardized parts and forward repair capabilities.
Builders of 1:35 scale model tanks should know that German tanks rarely showed extensive rust or weathering during active service. Most vehicles stayed operational for three to four years at most. Regular maintenance and repainting prevented severe deterioration. Modelers should limit weathering model tank effects unless they’re creating post-war abandoned vehicles.
Using weathering model tanks techniques not only enhances the appearance of your models but also deepens your appreciation for the historical narratives they represent.
The National Archives contains millions of World War II photographs, with extensive documentation of tank battles and their aftermath. These images are a great way to get references for scale model kit tank builders, showing authentic battle damage, wear patterns, and field modifications in various combat theaters.
Conclusion
Building scale model tanks needs careful attention to detail, specialized tools and deep knowledge of history. Modelers can create remarkably weathering model tank authentic pieces by studying World War II’s photographs and battle records.
This detailed guide gives modelers proven techniques to create realistic weathering model tanks battle damage. You’ll start with simple tools like weathering kits and safety gear. Then move to precise bullet impact patterns and become skilled at theater-specific weathering model tank effects. Each step helps achieve museum-quality results.
Creating authentic weathering model tanks battle damage relies on understanding historical context. Combat photographs from major tank battles like Kursk are a great way to get reference material. They show exactly how different ammunition types affected various tank models. These references help modelers accurately show everything from AP round penetrations to complex HEAT warhead damage patterns.
Paint application is crucial to achieve realism. Static models come alive through careful color layering – from base metals to rust effects and burn marks. These methods paired with proper weathering model tank techniques for different combat theaters turn simple kits into compelling pieces of military history.
Scale model tank building preserves history’s important stories and lets modelers expand their creativity. These expert techniques help craft pieces that showcase skills and honor the machines and crews that fought in World War II.


